By Michael James Adams
Recently, a long-held dream of mine came true: finally owning a Vista Series Squier Super-Sonic.
When Squier released the Super-Sonic in the late 1990s, I was immediately smitten with its reverse-offset body and headstock, fast looks and the sparkly blue finished model in particular. I had to have one. Unfortunately, it took until May of 2013 – 17 years after it was released – to make that dream a reality. Why wait so long?
For one, I had never seen one in person as none of the guitar shops in my area were willing to take a gamble on a flashy Squier guitar. I think the look of the thing scared them off, and soon I became caught up in other instruments. I consider myself lucky to have owned quite a few cool pieces in my day, but once a month or so my mind would return to the Super-Sonic, which has become a bit of a collector’s item due to its rarity, and players are seeking them out for their short scale and more familiar control layout as compared to the model’s close relative, the Fender Jaguar.
I finally found one for sale via Craigslist, and this one happened to be in Ohio. The guy was open to shipping and payment via PayPal, and was totally up-front about the broken pickup selector switch, a few scratches and lack of a case. I’ve never been scared off by a guitar having been ‘played in’, as they say, and because I was able to negotiate a better price I had no hesitation in pulling the trigger.
Once the guitar arrived, it was clearly in great shape. Because of the sparkly finish it was really difficult to detect the scars the seller had mentioned, but once I found them they turned out to be mere surface abrasions that easily polished out. Win for me! There was an added strap button and the switch tip had unfortunately snapped-off and was hopelessly lost years ago.
Without hesitation, I set about bringing this treasure up to spec in the hopes I’d be able to play it loud and proud at a forthcoming gig. As Ten would say, “Allons-y!”
Electronics
Even though I’d been pining for a Super-Sonic for years, I was also well aware of their apparent shortcomings. Probably the biggest detractors from these amazing Japanese-made guitars are the pickups: Duncan-designed and produced in South Korea, these pickups are known for flabby, muddy sound and insane amounts of squeal. Once I finally had one in my hands, I knew instantly why so many disliked them. They’d have to go.
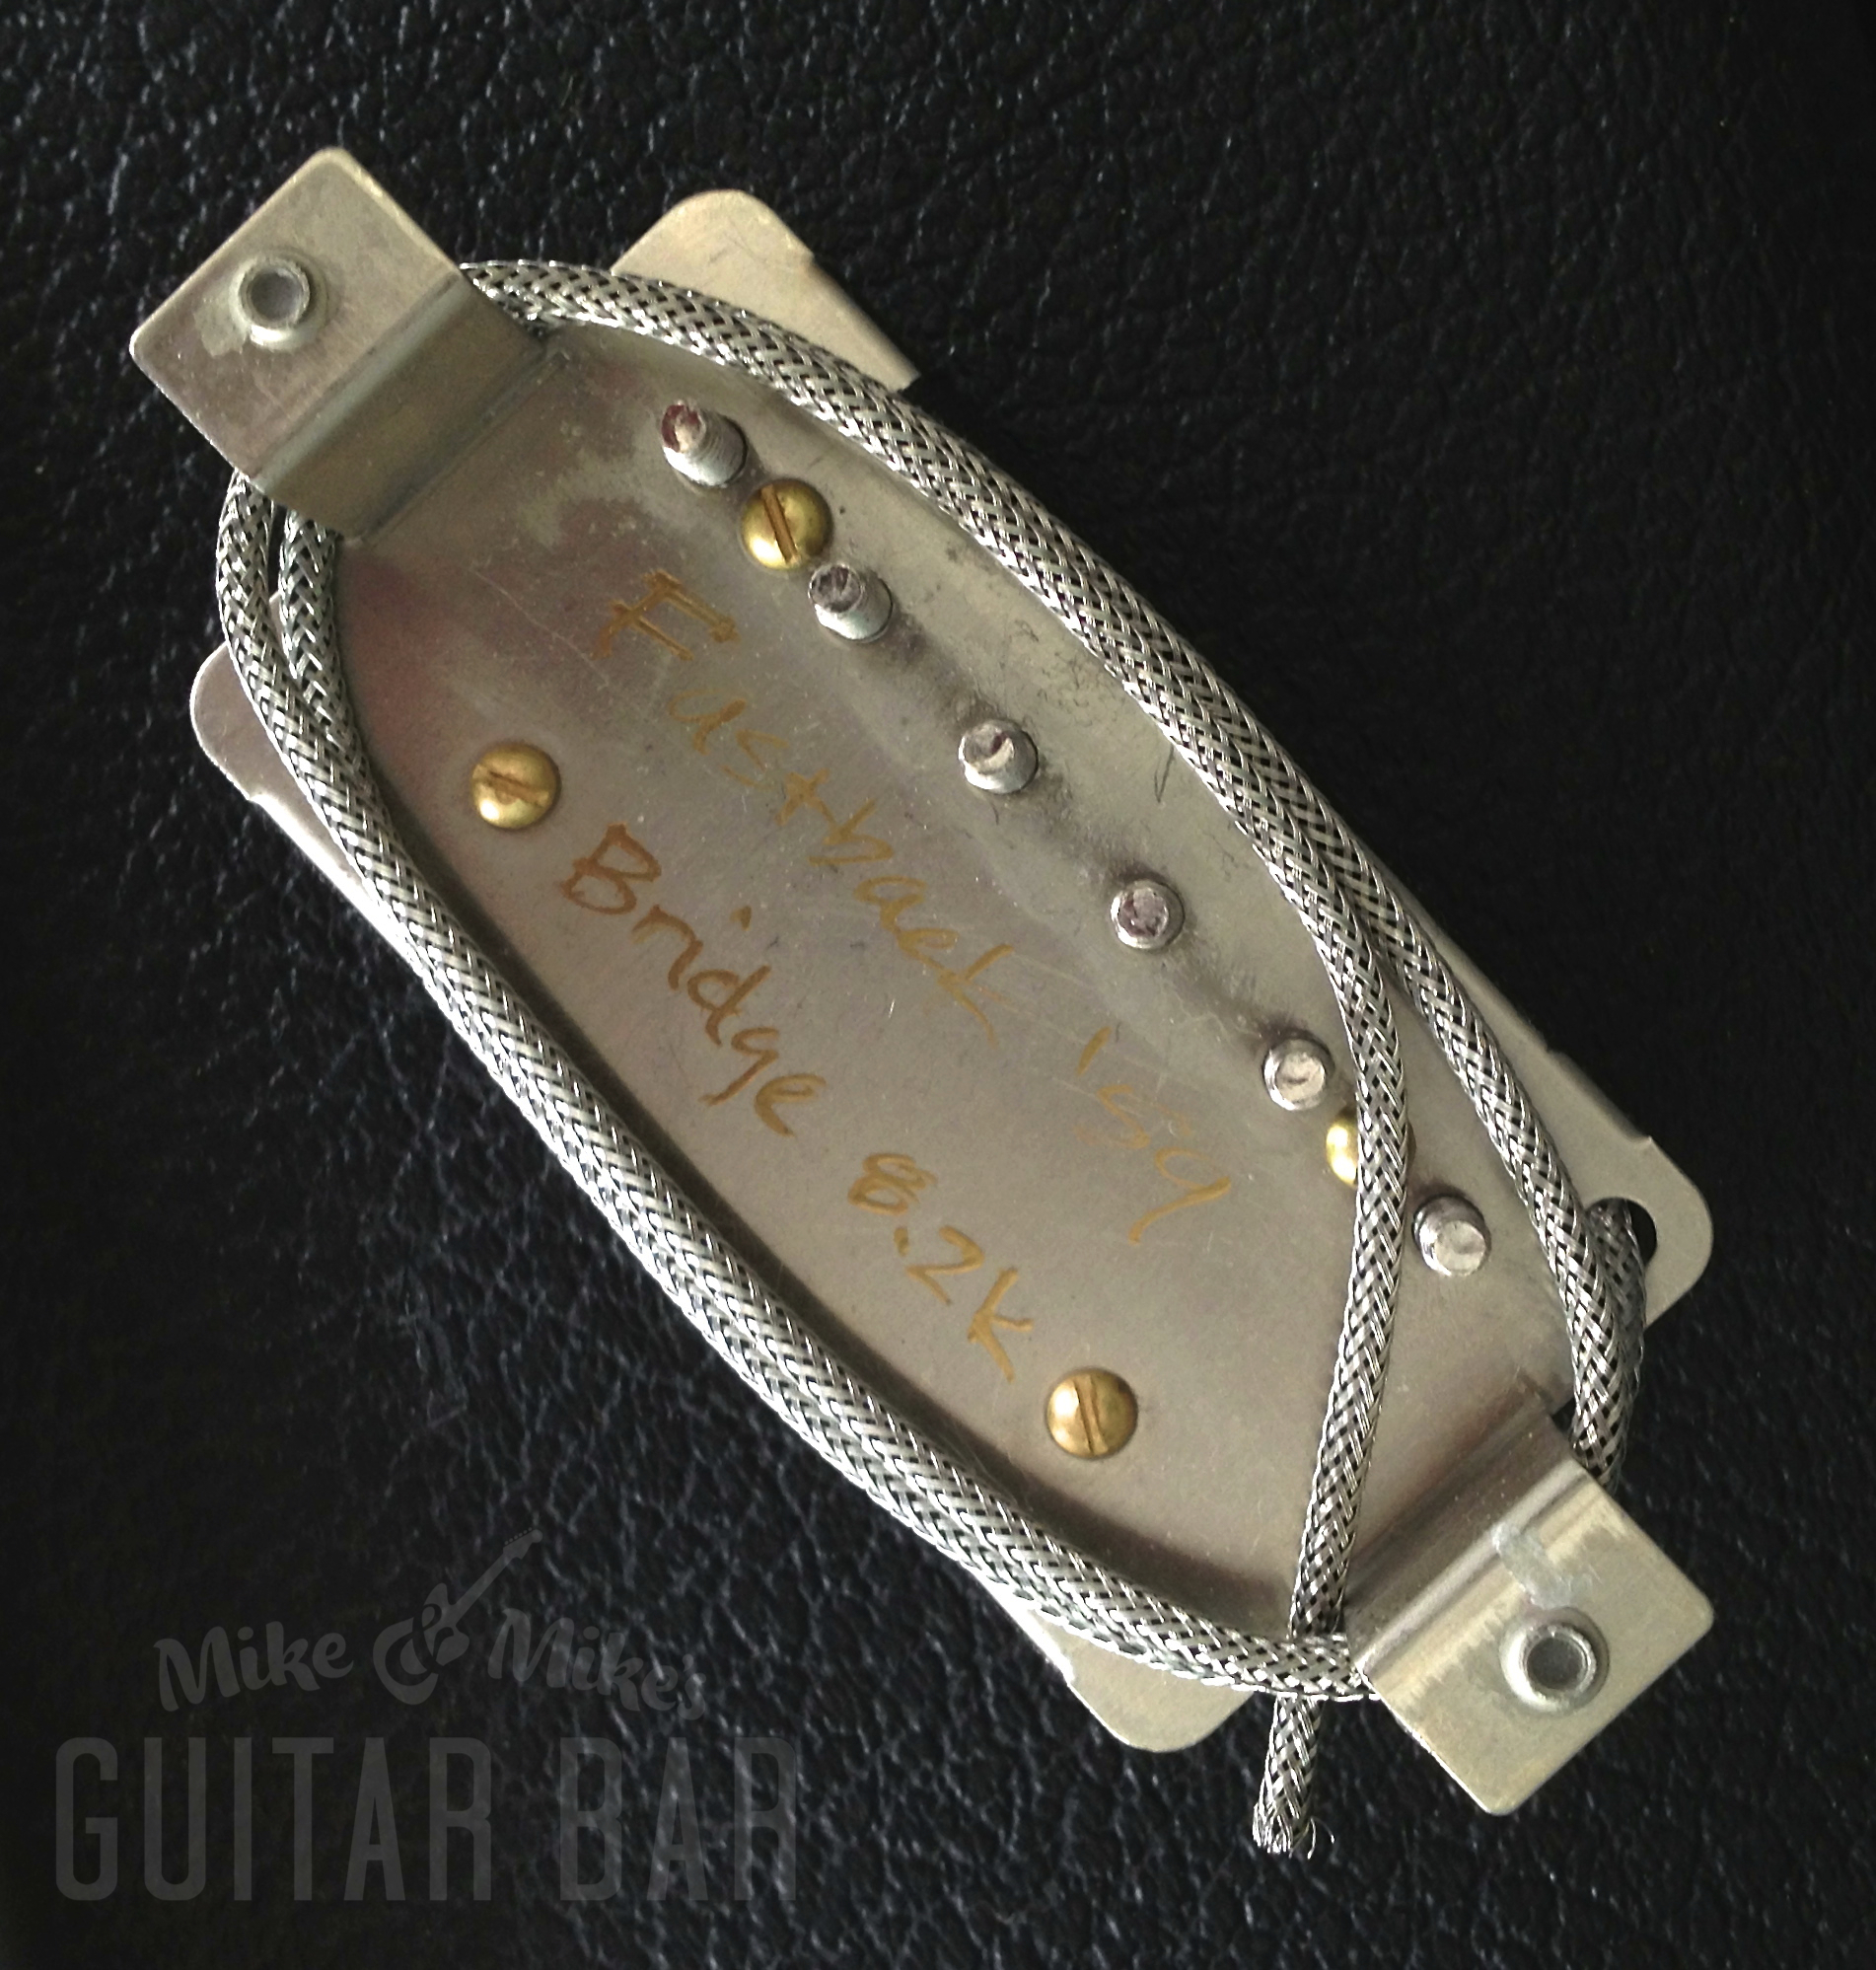
 Lucky for me, our good friends at Fastback Custom Guitars here in Seattle had just released their vintage-inspired ’59 Zebras, a set of pickups that aim to replicate that vintage Gibson sound with a slight modern twist. Not only do they sound great, but they also look the part, making them a beautiful addition to the already flashy nature of this guitar. A definite upgrade, and you can read my review of these impressive pickups here.
Next on the docket was replacing that broken pickup selector switch. Truth be told, I would have replaced it anyway, as I have little confidence in plastic-backed Asian market devices, having broken plenty of them in my day. Yes, my heart truly belongs to Switchcraft, and their short model was just the thing I needed for this project. Solidly built and just the right size, the switch also has a satisfying amount of resistance when flipping from pickup to pickup. AllParts also chooses randomly which color of tip to send, so I definitely lucked out with the correct black.
Since we’re being honest, I should admit that I just don’t trust the electronics found in most Japanese-made guitars. I’m not saying that the stock parts are unusable, but knowing how hard I am on guitars it’s always a good idea for me to fully upgrade the wiring harness. Pots, switches, wiring – all of it goes. I used cloth wire, CTS 500K pots and a .022 Orange Drop cap.
If you’re at all familiar with this model, you’ll note that the two controls found on its chrome plate aren’t what you’d expect; instead of the usual vol/tone combo, what we have here is two controls acting as individual volumes for each pickup. A nice thought, but I’m the kind of guy that likes having a tone control and a good capacitor on hand. I set about wiring the guitar in the more familiar 1950s Gibson tradition, for which I always use a 1950’s wiring diagram, which allows the pickups and tone cap to work together more transparently.
Hardware
I didn’t go quite this far because a) I’m quite content with the bridge as-as and b) I’m only willing to indulge my obsessive-compulsive upgrades to a certain extent. Even so, the original bridge and hardware aren’t bad at all. In fact, they’re quite good.
The original tuners work brilliantly, but if I were in the market for replacements I’d be looking to my favorite brand Tone Pros. Their Kluson-style machines are made with higher quality materials than the originals, and are super authentic in look but precision-machined for modern reliability. Wonderful stuff, there.
As for the bridge, it’s a great unit that stays in tune nicely. I could see myself going for a Callaham bridge at some point, but I’m not necessarily looking for true vintage Strat tones, you know? Man, what I’d really like to do is pull the trem, fill the cavity and route the body for a Jazzmaster/Jaguar vibrato and a Mastery. I won’t, but that would be amazing.
Cosmetics
Flashy as she was, there were a few visual detractors that I couldn’t simply gloss over; I’m a picky guy, I guess.
For one, the original knobs were a good bit smaller than standard Jaguar knobs, and of course won’t fit on the US pots I dropped in the guitar, so they had to go. I ordered some genuine Fender replacement knobs, which looked very, very new when they arrived. Given that my guitar had been played hard and had tarnished hardware, it didn’t make aesthetic sense to have bright, shiny knobs on the control plate. So, I set about the task of lightly aging them to match, using Other Mike’s ’63 Jazz Bass as my template.


Using my coarse-grit polishing pads I was able to de-gloss the knobs sufficiently, and after that I sprayed some lightly tinted clear coat on them to soften the look of the indicator. After dirtying them up a bit, I was left with knobs that had the perfect well-worn attire that belied their age.
The other eyesore about the guitar was that the previous owner had added a strap button on the upper bout, a common mod for these guitars. If you didn’t know, the Super-Sonic has its upper strap button on the neck plate, utilizing a longer anchor screw to accommodate the button itself. Some people really don’t like this – I didn’t at first! – but having gotten used to the way attaching the strap to the neck plate button shifts the guitar forward I couldn’t see myself using the other ever again. So, I set about filling in the hole and making it as invisible as possible.
 I doweled the hole with some scrap wood we had laying around the shop, and after the glue was dry my aim was to create a perfectly-shaped surface for whatever new finish I would lay on top. Because the addition of the new strap button had chewed out some extra wood, I had to use wood putty to fill in the missing bits. Simple enough!
After allowing the putty to cure for a few days, I was stuck wondering exactly how I was going to recreate the look of blue sparkle finish in such a small area. If it were a solid color or even a burst, that would be a far easier task; laying down sparkles in a convincing way would be tricky, especially when it comes to the way the original finish reflected light…
Then an idea struck me: “What about glitter glue?”, I wondered to myself. Soon enough, I found myself on the hunt for the right shade of glitter at Michael’s, which was appropriate. I stumbled upon the Recollections brand and found exactly what I was looking for: Peacock Blue.
That’s a nice match, innit? It’s even better out of the bottle. Michael’s only carried the two smallest flake sizes in their stores, so the next one up would have been perfect. But hey, I nailed the color, so why complain?
It took a few days to get this right, honestly; laying down layer after layer of glue and waiting for it to reduce as it dried, never quite being able to predict how the flakes would lay. Very tedious. After I achieved the right about of sparkle density, I covered it up with super glue, which polished to a high gloss after it dried. I think it came out pretty well, considering. I mean, it’s not an exact match, but it’s pretty damn close. And now I don’t have an extra strap button hanging out, nor do I have to deal with an open wound on my beloved instrument.

I forgot to upload this shot in my initial post, but better late than never.
Like I said, I’m really proud of how this turned out. Up close, you can definitely see the scar, but from a few paces away, the mind simply glosses over the offending spot, with the sparkly finish blending together in a pleasing way. Success!
The Final Product
Totally stoked.
Actually, I just noticed that the added strap button is still installed in this picture. I’ll replace it later. Grr/argh.

– MJA